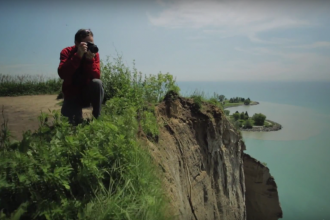
Some years ago, Jonathan Groeneweg’s father was on a research trip in India, and he documented his travels on film.
“He has all of these old negatives from India when tourism was not what it is today—and he has these very iconic shots,” says Groeneweg, who wanted to restore the images.
Fortunately for him, as the owner of Smokestack Studio, a Hamilton-based fine art print shop, he’s got the professional background to do it himself. For those with less experience, Groeneweg lays out five steps to bringing old photos back to life.
Clean up the hard copies
The first step to restoring old photos or negatives is to clean them up. “Definitely if you’re scanning a negative, cleaning the negative is extremely important to get rid of any small specks of dust,” says Groeneweg. Don’t use just anything to wipe down the originals. Groeneweg recommends a soft, lint-free cloth. There are also special negative and film cleaners available.
Scan the photos
After cleaning the photo or negative, you’ll need to have it scanned. You may have a scanner at home, but any old document scanner won’t really do. You’ll need access to a specialty photo or negative scanner for the best results. “If (the photo)’s printed large, you might need to do a digital capture of it, which would involve taking essentially a high-resolution photograph of it,” Groeneweg adds.
Retouch images using software
“The next step would be doing some—what we call—dust busting,” Groeneweg explains. Even after physically cleaning the photo, he says it is “inevitable” that bits of dust will be visible in the scanned image. There’s also the possibility of scratches or other damage showing up. Using software, one relatively straightforward way to retouch an image is by using a “cloning” tool. “That involves taking image content from one part and copying it directly to another part to fill something in or create something new,” says Groeneweg.
Back up your files
For all the inconveniences of shooting with film, there was at least one benefit. “Even if the print gets destroyed… that negative always exists. And it is a physical tangible thing that you could then reproduce if needed,” Groeneweg points out. Digital photography is another story—we’re only left with files. Because of this, Groeneweg stresses the importance of backing up files on more than one device. “Your hard-drive crashes, and you lose everything because it was never backed up anywhere,” Groeneweg warns. To avoid this scenario, invest in an external hard drive or even a USB key, but make sure the latter has enough space for large, high-quality photo files.
Print the photos out
“The other option instead of storing things digitally is to then make prints out of them,” Groeneweg suggests. With this, as with the scanner, the quality of the device is important, and there are printers you can buy that are specifically made for printing photos rather than text documents. “If you have a photo printer, the better the printer you have, the better the results—colour reproduction and that kind of stuff—you’re going to get,” says Groeneweg.
Also on RNR: